Bee colonies are susceptible to infection and infestation through attacks by pests and diseases. These include mites, bacteria, viruses, and fungi. A critical factor in preventing the spread and impact of disease and infestation is good hygiene.
You can clean and sterilize the hive, honey-harvesting equipment, tools, and clothing using water, chemicals, and even irradiation. Some top cleaning methods include using soda crystals, disinfectants, and fumigation.
Bees are social insects and thus are always at risk of being wiped out by disease epidemics. A clean environment goes a long way in preventing the appearance of pests and the spread of diseases. The guidelines we follow at our apiary ensure we not only increase our bees’ chances of survival, but we harvest clean honey and protect other bees from within our locality. Here is our step by step equipment cleaning guide.
When to Clean Your Beekeeping Equipment
Regular cleaning of beekeeping equipment is important for curbing the spread of germs, viruses, bacteria, and other dangerous microbes. The following are the times when you should take greater care and put more effort in cleaning and sterilizing your beehive.
- At the end of the season before storing away your clothing and equipment.
- Whenever you bring in your equipment from the apiary and are ready for storage.
- Whenever your bee colonies have shown signs of an infection or infestation.
- Whenever you buy any new or second hand hives or equipment.
- Whenever you reuse any equipment that may have been previously used against foulbrood infection.
- When replacing old comb.
It is important to remember that the bacteria responsible for American Foulbrood (AFB or Paenibacillus larvae) and European Foulbrood (EFB or Melissococcus plutonius) can survive in a colony’s comb for a long time, putting your colonies at risk of an outbreak. Thus, it may not always be safe or practical to clean, sanitize, and re-use exposed equipment. If the equipment looks too worn out or faces a high level of exposure and contamination, it may be more practical to dispose of it altogether.
How Do You Clean Bee Equipment?
Cleaning and sterilizing your beehives, beekeeping equipment, tools, and clothing is hard and time consuming work. Before getting started, you might need to map out how you’ll do it, from start to finish. What works for me is a simple to-do list.
List out all your equipment. Then make sure you have all the necessary tools. Cleaning infected and infested equipment can be hazardous to humans too. So when making your preparations include appropriate clothing, eye protection, proper footwear, and protective gloves.
If possible, organize to have a partner or assistant help you on cleaning day. I usually partner up with my neighbor who also belongs to our local beekeeping association.
You will be using chemicals in many stages of the cleaning and sterilization process. Ensure you read all manufacturer warnings and instructions before you start cleaning. Where you have to mix substances, make sure you mix in the right proportions.
Here are the instructions for cleaning different types of beekeeping equipment.
How to Clean Your Wooden Beehives
- Disassemble the wooden beehive into its constituent parts.
- Place all parts into a chest freezer at below -20 degrees Celsius for a minimum of 48 hours before cleaning and sterilization. Freezing kills some pests such as wax moths and microbes.
- On cleaning day, lay down pieces of cardboard or newspaper on top of your work desk. You want to use a disposable work surface and protect your floor, table tops, and regular workspace. The cardboard and newspaper works to catch any debris.
- Using a paint scraper or a hive tool, scrape all the wooden parts as thoroughly as possible. Remove all pieces of wax comb or lumps of propolis.
- Take extra care when scrapping debris off the internal corners and frame runners of the beehive. These areas provide ideal hideouts for pests and pathogens.
- If the frame runners look too dirty, remove them altogether and plan on replacing them when you reassemble the wooden bee hive.
- Once the wooden parts are completely free of adhering lumps and debris, wipe with a damp cloth and leave for about an hour to dry before you start the sterilization process.
- Burn up all debris that lands on the cardboard or newspapers.
7 Ways to Sterilize Your Wooden Bee Hive
After removing dirt and debris and wiping your wooden beehive, you will want to sterilize. Sterilization kills germs, bacteria, and other microbes. There are several different ways to sterilize a wooden bee hive.
Scorch With a Blowlamp
- Work from a well ventilated room without wind.
- Keep any children away from your work area.
- Wear protective clothing such as fire-retardant gloves and protective eye wear.
- Work on the wooden components one at a time to reduce chances of accidents. Do not lump all the wooden pieces together.
- Touch the wooden surfaces using the tip of the blue flame at the center of the larger flame.
- Ensure all propolis boils up.
- Make sure all the wood darkens to a uniform tan color, signaling that the wood has heated up to a high enough temperature for proper sterilization.
- Be especially thorough with the corners but avoid burning the wood.
Sterilize with Soda Crystals
You can sterilize your wooden hive using a solution of Sodium Carbonate crystals.
- Mix 1kg of washing soda with 5 liters of water.
- Add a cup of washing liquid to clean off any propolis residues.
- Dump one wooden piece inside the solution.
- Use a wire brush to clean off all surfaces, with special attention to inside corners.
- Put the damp piece of wood upright away from direct sunlight to dry off.
- Repeat the process with the other wooden components one after the other.
Immerse in Chemical Disinfectants
You can kill AFB spores and other bacteria by sterilizing your wooden bee hive with sodium hypochlorite at a 0.5% concentration. Household bleach contains about 3% sodium hypochlorite.
- Wear rubber gloves and eye protection.
- Mix some household bleach with water at a ratio of one to five, respectively.
- Immerse your wooden components one by one to ensure you reach all surfaces, corners, nooks, and crannies.
- Leave for 20 minutes.
- Lay out to dry and repeat with the other wooden components.
Fumigate With Acetic Acid
The evaporation fumes of acetic acid are effective at ridding your wooden hive of spores. These include spores of wax moths, chalkbrood, and Nosema spp. However, it’s still unclear whether acetic acid is effective for controlling AFB and EFB spores.
- Buy acetic acid from a chemical supplier.
- Stack your wooden components on a work table or floor. Acetic acid is corrosive and will react with metal and concrete surfaces.
- Use some tape to block bee entrances at the bottom of the stack. Acetic acid is heavier than air and will flow downwards from the top.
- Put a non-metallic saucer inside the stack, near the top.
- Carefully pour out 120ml of acetic acid, at 80% concentration, into the saucer and cover the stack with an empty hive.
- Use a hive cover to cover the top hive and the stack below.
- Use tape to seal any leaking holes or joints.
- Leave the stack for at least a week for complete fumigation.
- After a week, carefully remove the saucer and unstack your wooden components. Air out the pieces for a couple of days before reassembling.
Boil In Caustic Soda
This sterilization method isn’t suitable for the average backyard beekeeper. That’s because the chemical will easily burn your skin. Also, it’s a little more complicated to dispose of the used chemicals. Boiling in caustic soda needs extra precautions and care.
Nonetheless, if you decide to go ahead, you will need a tub and Sodium Hydroxide.
- Mix 450g of Sodium Hydroxide in 38 liters of water.
- Bring the mixture to boil.
- Immerse the beehive’s wooden components into the tub of boiling caustic soda for between 10 and 15 minutes.
- Remove the parts one by one, immediately dipping each into another tub of clean boiling water.
- Lay the parts away from direct sunlight to dry.
Dip In Molten Paraffin Wax
This is another method which may not be practical for a backyard beekeeper. It’s a dangerous process that requires some skill. You will also need heavy duty protective clothing and specialist equipment mostly found in professional labs.
- First, you will need to heat up paraffin wax to 160 degrees Celsius for ten minutes. Paraffin wax has a flash point of 190 degrees Celsius so you have to take care not to get near that point.
- Dip one of the wooden components into the hot paraffin wax for a few seconds then remove.
- Repeat with the rest one by one.
- Once the wax cools and solidifies, use a scrape to leave the wooden surfaces as clean as possible.
Irradiation with Gamma Rays
There are companies that clean your wooden hive components such as empty comb and stored supers using gamma rays. The operation is conducted from specialized labs and they use 25KiloGrays to eliminate foulbrood spores.
If you use gamma rays, ensure you only irradiate components that are completely free of signs of contamination. This is because it will be impossible to visually tell which areas have been irradiated and which ones haven’t. So you might inadvertently return an infectious untreated part, leading to a fresh colony epidemic.
This method requires high skill, specialist knowledge, a lab environment, and specialized equipment and clothing.
How to Clean and Recycle Wooden Beehive Frames
Frames may carry spores, germs, and pest infestations. When you purchase used frames or use frames from an old hive into a new hive, you will need to take some precautionary care. You can purchase steaming apparatus from your local beekeeping stores or organization.
- Start by piling your dirty frames onto the steam apparatus’ collection tray. The collection tray fits the hive floor and has one opening along one edge.
- Cover the dirty frames with the purpose-built cover.
- Attach the apparatus’ hose pipe to the top of the sealed chamber then switch on the apparatus.
- The wax will slowly melt and drip off the edge with the opening into a wax collector below.
- Treat each batch for at least one hour to ensure you collect as much wax as possible.
- Once you’re done steam cleaning, you can sterilize the wooden frames with the same methods used for cleaning wooden hives. My preferred sterilization method is to use washing soda crystals.
How to Clean Plastic or Polystyrene Hives
Plastic and polystyrene materials are a common and popular alternative to wooden beehives. Poly hives are popular in colder regions because of their increased insulation compared to wooden hives. Other benefits of poly hives include:
- Easier cleaning and sterilization.
- Easier dismantling and reassembly.
- Colonies take better advantage of the honey flow, often resulting in 25% more yield.
- Earlier buildup, so you can make colony splits and raise more queen bees.
- The laying of eggs across all frames as there are no colder outer frames. So the colony produces more nucs.
- A more constant temperature so worker bees can take more cleansing flights and keep the hive cleaner.
- The insulation results in better moisture flow, leaving the hive dry and free of mold or mildew.
- No rot and lack of tiny nooks and crannies from where pests can hide in.
Because of the nature of plastic and polystyrene, these beehives require much less cleaning and sanitizing than wooden hives. Additionally, when you do have to clean and sterilize, the work is much easier, requires less effort, and the results are more effective. To clean polystyrene hives:
- Wear protective gloves, clothing, and eyewear. You will be using caustic chemicals.
- Scrape off any excess wax and propolis.
- Soak the hive in a washing soda solution mixed with a small amount of washing liquid.
- Scrub all surfaces to clean off all dirt and debris.
- Rinse with room temperature water and wipe dry with a clean piece of cloth.
- Sterilize with hypochlorite such as that found in normal household bleach.
- After a few minutes, wipe to dry and your poly hives are ready for reuse.
Note that some methods you can use for wooden hives are out of the question for polystyrene hives. For instance, using a blowtorch would damage the plastic. So would molten wax.
When experimenting with new chemicals or cleaning agents, first test it out on a small corner of the poly hive. Give it a few minutes, or up to half an hour and only proceed if there’s no sign of damage.
How to Clean Your Queen Excluders
The queen excluder limits your queen’s movements to only the lower brood boxes. It needs to be clean so worker bees can pass through on their back and forth trips. Regular cleaning of the excluder also helps remove mites and other pests. Excluders can be cleaned in much the same way as you clean hives, depending on material.
- Start by scraping off debris, wax, and propolis. It’s always easier to scrape off propolis during the cold winter seasons than in warm weather.
- Use a brush wire to brush off stubborn lumps of wax and propolis.
- You can use a blowlamp to scorch wire excluders. However, be careful not to melt any soldered joints.
- When you detect foulbrood, you will need to burn the excluder. However, the excluder might burn up and become destroyed if it’s zinc-slotted.
- You can skip the burning and wash with a washing soda solution mixed with a bit of washing liquid.
- You can wash and disinfect plastic excluders in the same way you wash and sterilize polystyrene hives.
How to Clean Your Beekeeping Suit
Beekeeping suits keep you protected when you’re inspecting your hives or harvesting honey. However, if the suit is dirty, it can introduce pathogens and infections to your bee colonies.
Additionally, the suit collects bee stings and some of the stings release pheromones. These pheromones agitate other bees when you come near their colonies. Thus, cleanliness and good hygiene are of paramount importance.
When cleaning your beekeeping suit you want to avoid stress and damage to the fabric. Here is a step by step guide on how to clean your beekeeping suit:
- Empty all pockets.
- Detach the veil to wash separately.
- Clean out any stains.
- Pull close all zippers.
- Undo all cord tighteners and keep them loose.
- Wash in your washing machine according to the garment’s care instructions.
- Rather than tumble dry, drip dry on your regular clothesline.
How to Clean Your Beekeeping Head Veil
Your veil is one of the most important protective equipment in your beekeeping arsenal. It allows you to see and breathe safely away from the sting of angry bees.
Because the veil has netting, some of it could get stuck in a washing machine. Thus it is always advisable to hand wash your veil each time. Washing by hand will prolong the veil’s useful life. Handwashing also enables you to inspect your veil closely with each wash, rather than only noticing damage when bees have seeped through and are already attacking your face.
Another benefit of washing by hand is that the veil’s black coloring won’t fade as fast. Once the black fades, it will become more difficult to see through and you’ll need a replacement.
In case you can’t hand wash and really have to use the machine, you can use a delicate detergent and set the washing machine on a gentle cycle. Pick a detergent that doesn’t cause fading, stretching, or shrinking. Never put your veil on tumble dry. Drip dry by hanging on the clothesline.
How to Clean Your Beekeeping Gloves
As a beekeeper, your hands are the most likely to get covered in dirt, mud, sludge, wax, propolis, and all sorts of debris. Also, the hands may carry around germs, infectious substances, and vermin. If your gloves are dirty or infectious, you could transfer diseases and pests from hive to hive and colony to colony without knowing.
Cleaning your gloves depends on the type of materials your gloves are made of. Here’s how we clean some of the most common types of beekeeping gloves.
Synthetic Gloves
Beekeeping synthetic gloves can be made from either:
- Nitrile – synthetic rubber made from organic materials.
- Neoprene – synthetic foam rubber.
- Latex – natural rubber.
All these types of synthetic gloves can clean up really easily with soap and warm water. You can keep a bucket of warm soapy water handy as you inspect your hives. After visiting each hive, you quickly dip your hands in and rinse. This helps protect from transferring pathogens from one hive to another.
To wash synthetic gloves, you can simply throw them into the washer with your regular laundry. You should never dry synthetic gloves in the dryer. They might melt and ruin all your other clothes and probably your machine too.
Keep in mind that synthetic gloves are popular because they are single-use. If you can dispose carefully, then they are affordable enough to keep around and skip the hustle of cleaning gloves.
Fabric Gloves
Fabric gloves offer better protection from bee stings compared to synthetic gloves. However, they also get much dirtier far more easily. Unlike synthetic gloves, dirt, propolis, and wax can seep through the fabric’s fiber. This makes the gloves more difficult to clean.
To clean fabric beekeeping gloves:
- Use a scrape or hive tool to remove all the crusted wax, loose honey, and propolis.
- Soak your gloves in hot water.
- Add some pre-wash solution capable of loosening wax, propolis, and honey stains.
- Wash the fabric gloves in hot water. You can use a fabric-safe bleach in addition to your detergent.
- If you still have some tough stains, you can use white vinegar. Hydrogen peroxide can work too though some beekeepers feel it might be harmful to their bees.
Leather Gloves
Leather gloves are the most effective for preventing bee stings. However, they are the toughest to clean and stingers get really stuck in leather. Once the stingers stay long enough embedded in the leather, the gloves start to stink of rot.
Regular dirt isn’t much of a problem for leather as you can just wipe it off in most cases. What you need to worry about is the wax, propolis, stingers, and sticky glue. Clean your leather by:
- Scraping off any loose material.
- Wash in warm water using a mild soap or detergent.
- Soak overnight in chlorine water to loosen stains and remove stubborn dirt.
- Rinse and drip dry in the sun. Be sure to do a thorough rinse as some people have skin sensitive to chlorine. The chlorine could also irritate your colonies.
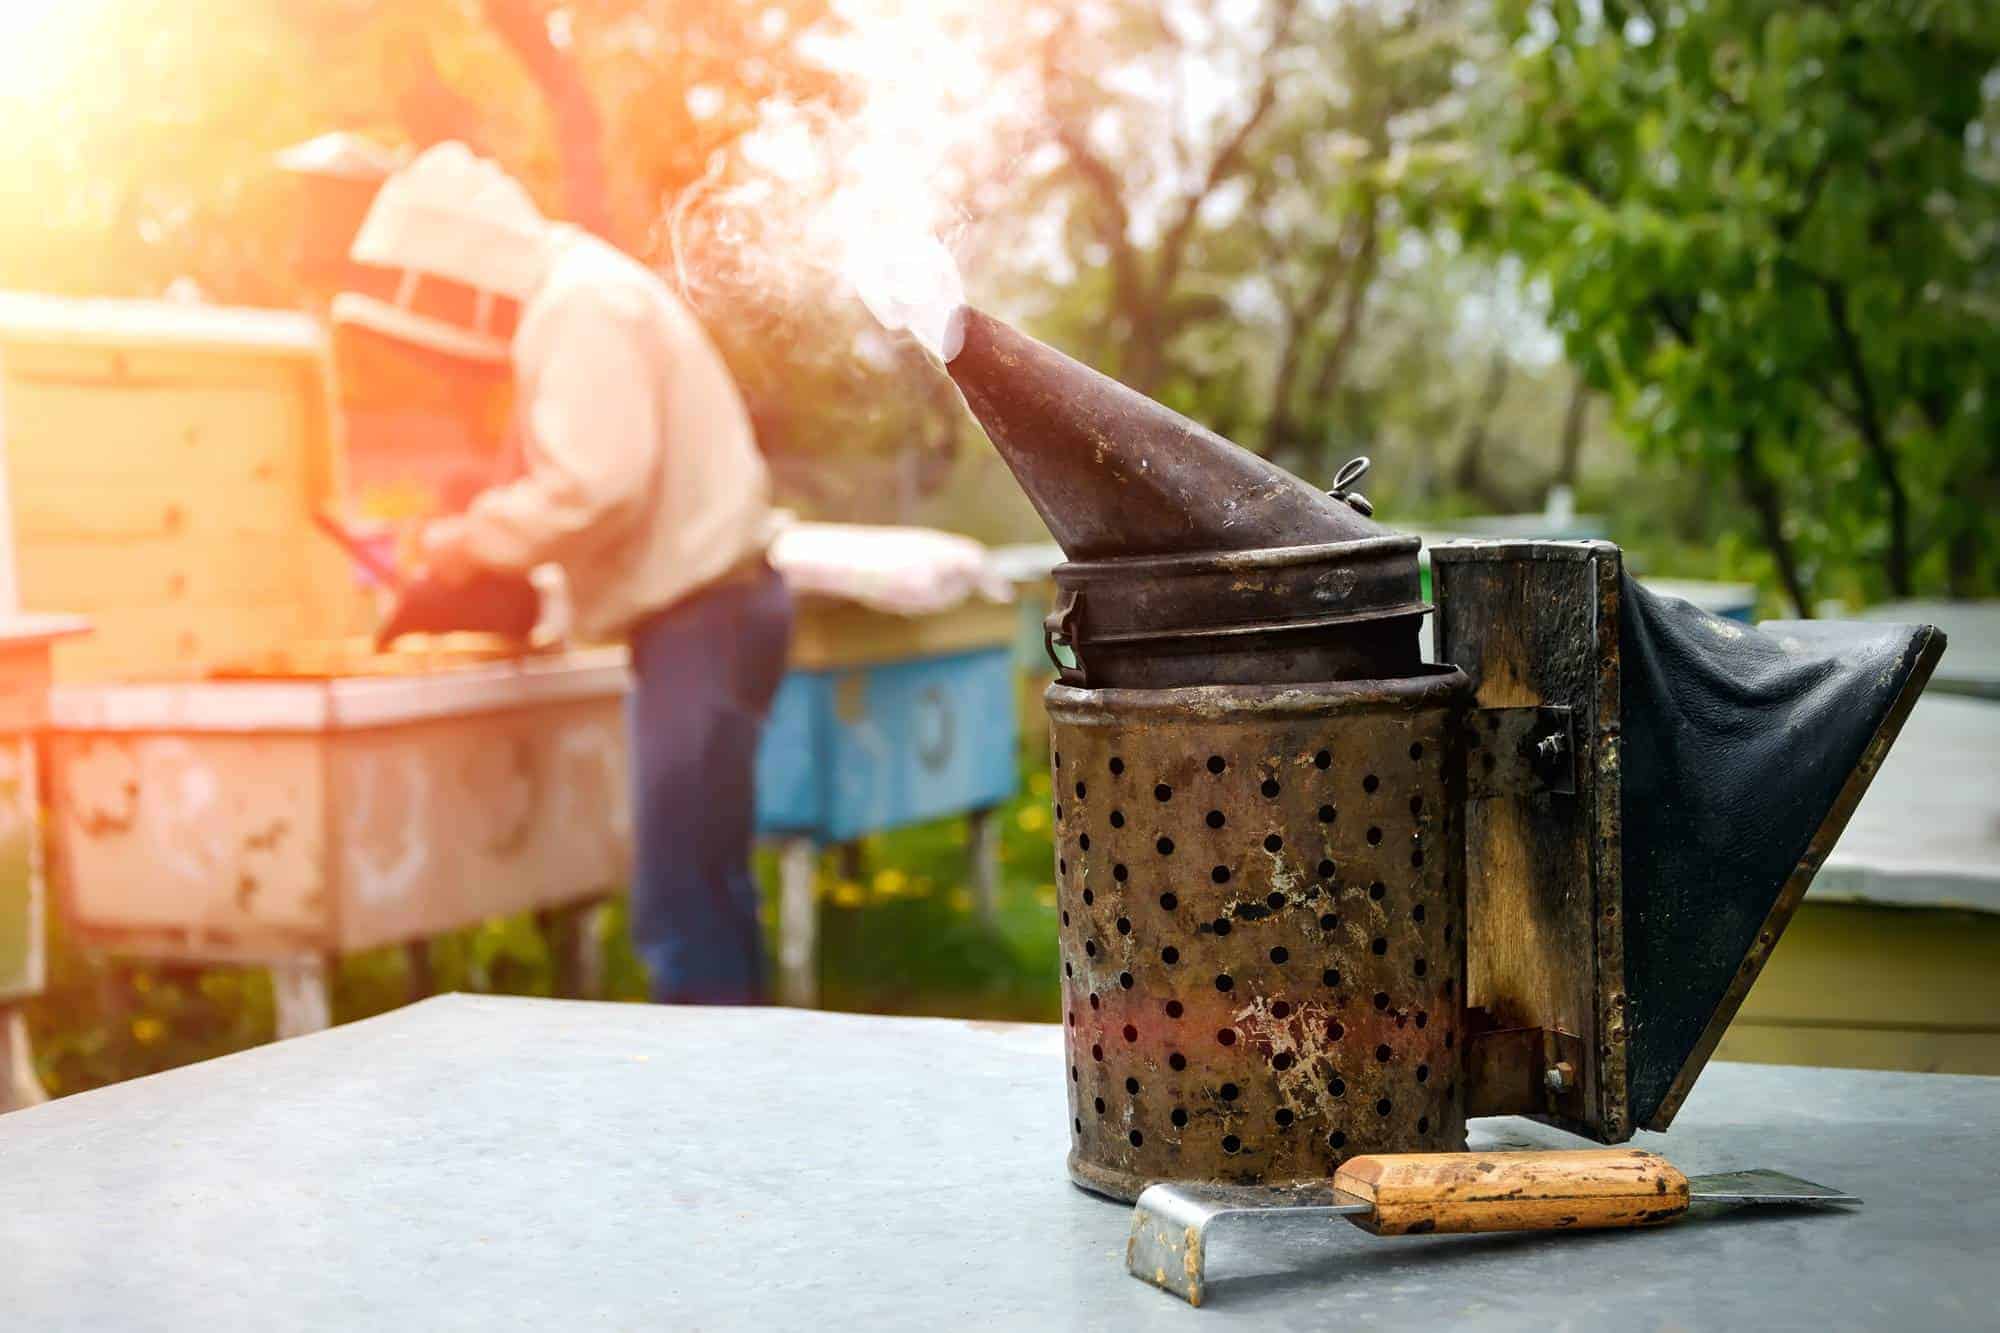
How to Clean Your Bee Smoker
According to a University of Minnesota Instructional Poster your bee smoker can easily accumulate creosote, soot, and goo. Without proper and regular cleaning, your smoker may start only giving off a little smoke even when your fire is going well.
Doing some simple cleaning and maintenance once or twice a year can be enough to keep your smoker at optimal performance.
- Start by using a scraping tool or chisel to remove debris around the lid and the hole where the smoke comes through.
- Remove the grate at the bottom of the smoker.
- Scrape with a hive tool or use a wire brush to clean off soot and debris. Make sure to clean inside each of the grate’s holes.
- Scrape off any debris you find below the grate and dispose in a small pit or in a bag then dump in your regular trash.
- Remove the nuts connecting the bellows to remove the bellows from the smoker.
- Inspect the bellows for any leaks by holding a finger over the outlet and squeezing the body.
- You should replace leaky bellows or use some duct tape to plug the leaks.
- Oil the threads of the bellow’s screws or bolts. Replace the bellows and grate.
- Your smoker is now clean and well maintained. It should now work as good as new, emitting plenty of white smoke free of soot.
How Do You Dispose Of Contaminated Beekeeping Equipment?
As a beekeeper, you will often find you have some contaminated equipment that you need to dispose of. If done without care, a poorly disposed contaminant can create endless cycles of infections. Here’s how to safely and carefully dispose of contaminated beekeeping equipment:
- Dig a pit at least 45cm deep.
- Throw in your wooden equipment.
- Douse with liquid fuel.
- Light it all up.
- Cover the pit with soil.
For plastics, you will have to find a disposal company in your area that deals with contaminated plastics. You should not burn plastic. In some areas, burning may be illegal.
Normal landfills don’t discriminate over contaminated and uncontaminated plastics. Hence, throwing the plastic components in your regular trash will just end up in the normal landfill where it may continue infecting local bees.
Conclusion
Beehive cleanliness and equipment hygiene is crucial for sustainable beekeeping. Proper cleaning can save your colonies from the spread of pest infestations and viral or bacterial infections.
The work of cleaning tools, equipment, clothing, and hives can be long and tedious. Doing it right each time can save you the trouble of having to repeat and the hustle of fighting bee infections.